Spring Time: 5 Steps To Revive Your Backyard

Spring has come with its sunny weather and lush greenery, inviting you to spend more time in outside, in the backyard. This, respectively, raises the question “Have you prepared your backyard for spring time?”. If you haven’t there’s no need to panic, you could do that with few efforts.
1. Clean Up
Regardless of how hard the winter has been to your backyard you can’t refresh it, if it’s cluttered with various objects and the grass is not trimmed. So, your first step would be to get rid of the clutter and trim the grass.
2. Hide The ‘Bold’ Spots

If there are ‘grassless’ spots here and there around the yard you could easily hide them. Take a few large flower pots and place them on the ‘bold’ spots. Thus you’ll hide the ‘grass holes’ and the flowers will have enough light and air to thrive. If they spots are closer to the centre of the yard, the objects you’ll place will probably get in the way. In this case you could place a few flat stones or garden tiles and make a small path. It’s both practical and will hide everything you want.
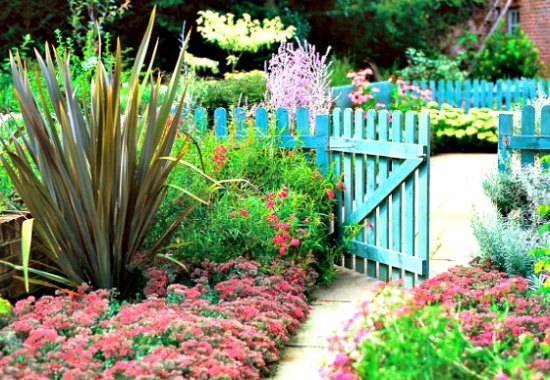
3. Picket Fence

Image Source: www.flickr.com
Snow, rain and wind sometimes have a devastating effect on the outdoor painted elements, regardless of the quality of the painting materials you’ve used. In this case it would be best to repaint the fence following these simple steps:
1) First, you should clean the surface you’re going to refresh with the help of a garden hose. If you neglect to do this you’ll risk damaging the new paint coat, as it won’t be smooth.
2) When you’re done with the first step you’ll have to strip the old paint layer off. Naturally, it will take some time, as you should strip everything off, so the new layer is even.
3) There’s still one thing you should do before you start the very painting, so take your impatient hands off the brush. In order yo apply the perfect coating on the wooden surface, you should make it perfectly smooth. For the purpose you’ll need sand paper and a pair of gloves to protect your hands from the nasty splinters.
4) To paint the perfect layer you need to give it a coat of primer first. Thus, if there are any uneven spots, you can’t adjust, the primer should do the trick.
4. Some Factors You Should Consider
The choice of colour is not the only thing you should carefully consider. In fact, it is your least concern. If you want your pretty picket fence to withstand the harsh sun rays and heavy rain, you should do a little research first. Choose the paint in accordance with the weather conditions of the area you live in. This would basically mean that if it rains frequently, it would be best to choose a paint which will endure the moist and heavy rainfalls and keep the wood intact.
5. Final Steps

Image Source: commons.wikimedia.org
After you’ve done all the research and hard work, chosen the paint and applied it, you have to leave it dry for 24 hours. Just in case put up a sign “Wet paint”, so your project doesn’t get ruined. If you wish to apply a second coat of paint, you should do it after the first one has dried completely, otherwise the whole fence will be ruined with brush marks. After it’s dry, you should apply one or two coats of paint sealant, to provide the fence with better weather protection.
This task is neither rocket science, nor a piece of cake. However, if you’re too busy with other tasks and don’t have any time ans skills to invest in this type of project, it would be better to call Bob’s Handyman’s proficient painters. With their years of experience and high-quality materials, they’ll provide your with excellent and timely results.

Leave a Reply